Pages

Wednesday, June 18, 2014

I'm Fickle Over Flowers

Hello All :)

    Today the new challenge at Krafty Girls is starting.  This one was so much fun! The challenge is to make something with "Flowers".  At Krafty Girls they have extended the challenges to be bi-weekly rather than weekly.  Hooray! Now more of you guys can participate!

    After almost not getting the first challenge in by the deadline, I was not going to let that happen again. Then, the challenge was extended, so I ended up making 3 cards. That's right... 3!  They are three different styles too. The only thing they have in common, other than flowers, is that they are all A2 sized cards.

    One of the problems with having 3 cards is that I kept changing my mind as to which I would submit for my design team project. They each, at some point, were the one I was going to submit. But you all over here are the LUCKY ONES! you guys can see all 3 in one place.  What?!? I know.. I'm so giving. ;) I'll post them in order of when I made them.


This is the first card I made. (also the one I submitted) This was my first attempt at coloring with Spectrum Noir markers. The mats aren't crooked, the dimension of the card casts
awful shadows. I literally took 50+ pictures trying to show how straight my margins are, but unfortunately the sunlight wouldn't cooperate.


This photo shows the embossing I did on the sentiment, and the glitter paper I used.
Unfortunately, it also shows that my baker's twine is not black, it is navy blue. (it was
supposed to be a secret)


This was my second card. I really liked the flower, and based the whole card around it. I love this paper and color combination.  It looks a little plain to me though...I couldn't find any other embellishments to give it more life.


Don't you love the dimension on that flower? I inked the edges since they were white. and I dipped the entire sentiment onto my Versamark watermark pad, and used clear embossing powder
to give it that shiny almost laminated looking texture.


This is the third and final card. This one is almost my favorite, but as my daughter said.. it looks like every other card.  I really love this sentiment, I say it all the time.
 
 
Here is a close up to show the detail of the frame, and the embossed sentiment.


    Okie Dokie, that's all for the flower fickleness. You guys should go on over to the Krafty Girls Challenge Blog, and submit your "Flower" Projects! It's so much fun, Really! 
       
     This week I am going to start playing with my new WRMK Evolution Advanced machine (with letterpress), and the square-hole Cinch. I also really need to start using my embossing folders. If you guys have any unique ideas for embossing folders.. send them my way! Thanks for Reading!
 
~Dusty
 
 
Card 1:
1. Unity Flower Stamp
2. Spectrum Noir Markers
3.Recollections Cardstock.
4. Baker's Twine by doodlebug
 
Card 2
1. Fancy Pants ParkBench paper
2. Michael's grosgrain ribbon
3. Stamp and Die from Doodlebug by Hampton Art
4. I can't remember where the flower is from :( I think it's Basic Grey
 
Card 3
1. Pebbles Garden Party paper
2. Recollections Cardstock
3. Stamp by Unity Stamp Co.
4. Lace Ribbon from Michael's dollar section.

Monday, June 9, 2014

Stay Classy San Diego!

Hello All :) (disclaimer: This post has nothing to do with San Diego or Anchorman for that matter)

  It's been about a week since I have posted.  I am trying to get the hang of being on a design team, which honestly, is sooo much fun!  Krafty Girls is a great bunch of ladies and they have some pretty uh-mazing projects.  I am really having to step up my game here. There have been some changes, so I am not posting the next challenge project just yet, but I thought I would share one of my favorite cards I have made yet.


  This card was the most fun I have ever had creating.  I made this as a back to school card for my 17 year old sister.  I think it's pretty funny, and she did too.  I hope none of you find it offensive.  I assure you it was all in good fun.

  It all started with a sentiment from the "Give a Hoot" Cricut cartridge.  As soon as I saw it, I knew I had to make a card for her with it. This also gave me the freedom to make this card as loud, vibrant, and tacky as I could. (hence the most fun card ever!) I was definitely channeling Peg Bundy from "Married with Children", minus the animal print.

  So let's get started. I even have step by step pictures. Forgive the quality they're from my phone, and honestly I am too lazy to edit them. lol There are quite a few pictures, and I'd have to make them all match.  I'm sure you all don't mind a little "background" right? good :)


1.

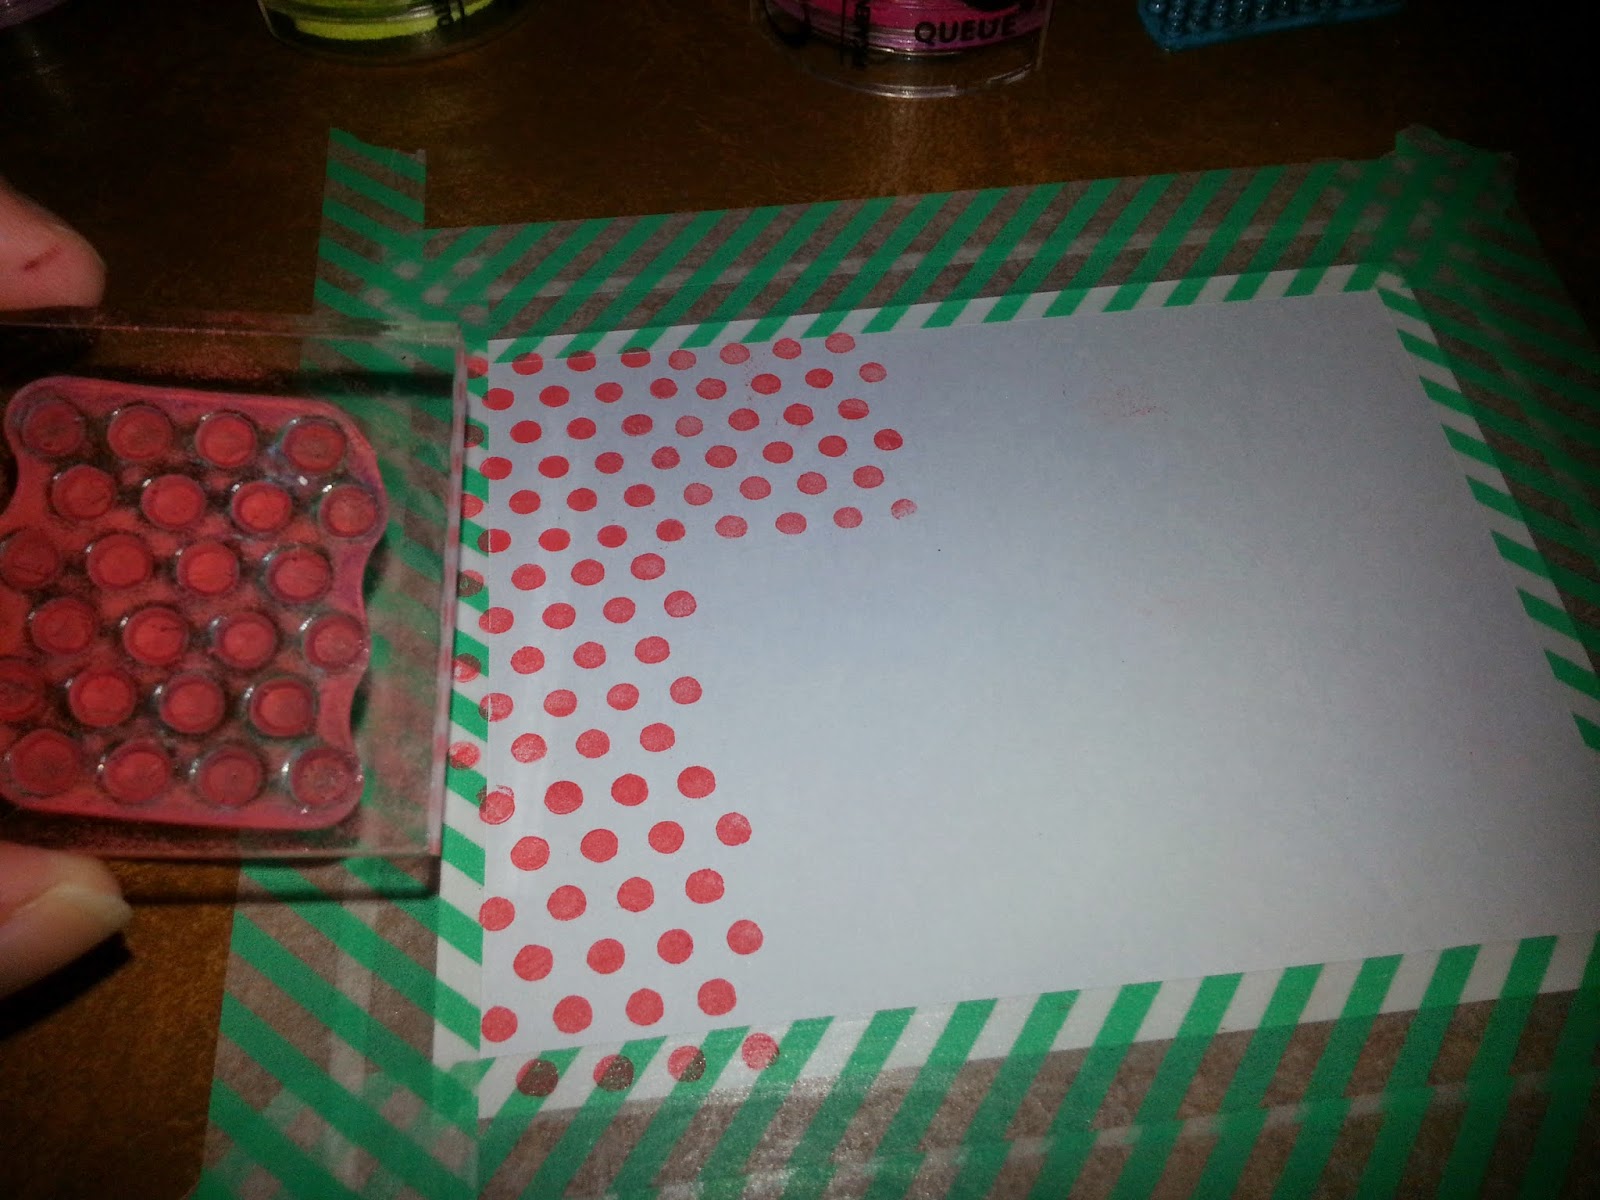
I decided to stamp my own back ground first, so here I masked off my top piece. Since I wanted a little white on the edges I placed the washi tape at a uniform distance all the way around.
 
2.
 
This is the background stamp I decided to use. At the time I didn't have a polka dot embossing folder, which would have made things much easier and didn't want to commit to a large background stamp. So teeny tiny stamp it was.
 
3.
 
Here comes the vibrant color. This is a Cat's Eye Pigment ink from Color Box in Picante.
This color is fantastic, it's like a super bright red orange.
 
4.
 
It was so hard to stamp semi-uniformly over and over. this is almost half way through. (you'll see that I messed up later. ha!)
 
5.
 
I then inked the edges in Surf blue, that's from the same color pack by Color Box.
 
6.
 
I then chose some lime green cardstock for my card base. It's probably from Recollections, most of my solid 8 1/2 x11 is.  I also chose my brightest loudest ribbon.  Look at how it ties all the colors together, I'd love to say I planned it, but sometimes things just work out.  I know I got it at Michaels on sale. The card looks terrible now, but it's starting to come together. (I bet you see those crooked lines now too huh?)
 
7.
 
Yes, this is my practice sheet. I used it on my card, but with that Therm-o-web Super Tape ain't nobody going to get to see the nasty back.
 
8.
 
Just in case you didn't know what Super Tape was.
 
9. It's all coming together
 
 It's cute right? I cut the sentiment out with glitter paper and the shadow with metallic paper
. The trashcan tore a little on the lid, but it still looks okay. I used a silvery grey paper for
 the can and in the lines is a metallic pink.
 
10.(told you there were lots-o-pictures)
 
I used some nail art glitter flakes from Dollar Tree for the "trash".  There was supposed to be a bear coming out of the can, but it just didn't fit with the sassiness I was going for.
 
11. And how I made this Sassy card into a back to school card...
 
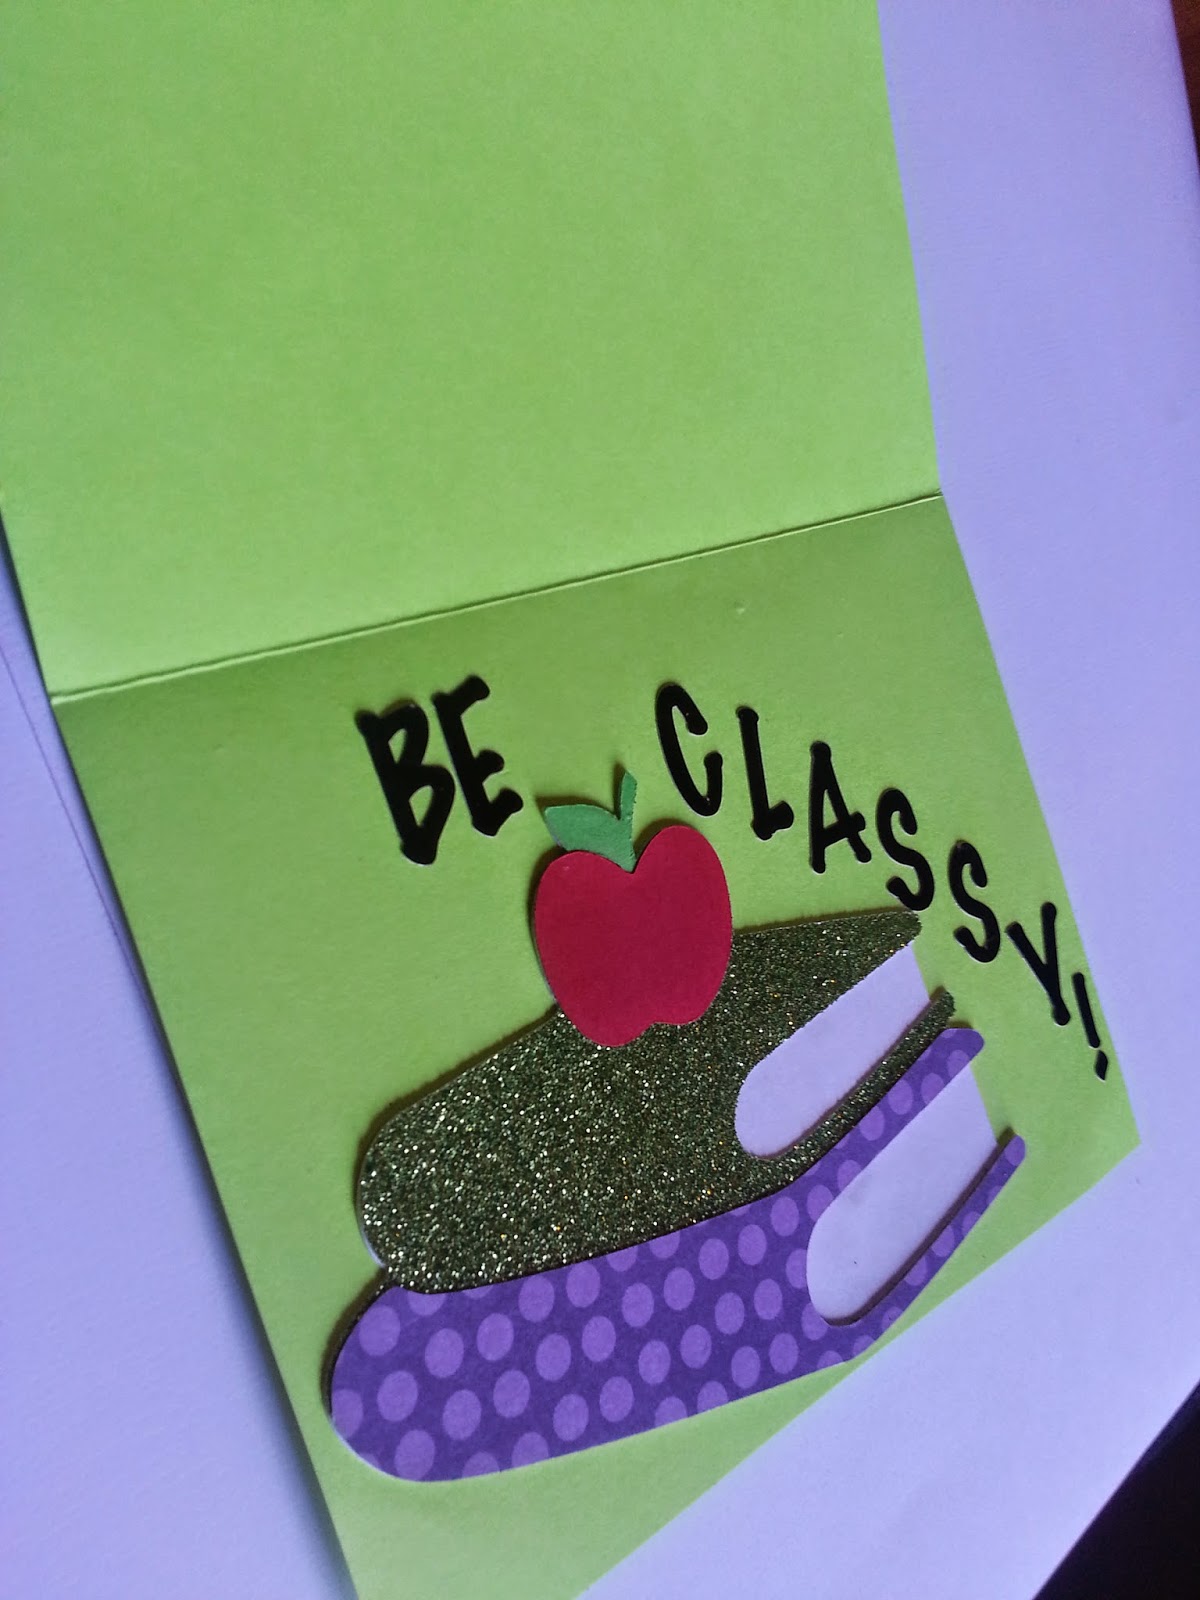
Lol, I know it's tacky to laugh at your own jokes, but I still laugh about this card. (Plus I have to me kind of tacky to make that front right?)  I used the Cricut "Recess" cartridge for the books and apple. They really made the card complete.
 
12.
 
I used white cardstock, some purple Halloween paper, and green glitter paper. "Be Classy" was actually black stickers I had left over from a previous project.


   Well, that is it for my  "classy" card. I hope you liked it.  Leave me a comment, or send me a message.  I'd love to hear from you!  Thanks for reading!
 
~Dusty


Wednesday, June 4, 2014

First Krafty Girls Design Team Project

Hello All :)
     I am sooo excited to be a part of the Krafty Girls Design Team. This is really significant for me, personally.  I am not a seasoned crafter, and I really have only created a dozen or so projects. I needed validation. I needed to know I wasn't terrible at this, and wasn't wasting all of my husband's hard earned money.  I actually have a confession to make (This is beginning to be a habit here). Until I was selected for the DT, my paper crafting was a SECRET!

    When I received the e-mail telling me I had been chosen, I was so excited I squealed. (Mind you this was 11:45 pm my time) I immediately got quiet, not only so I wouldn't wake my sleeping husband, but I also wasn't prepared to explain.   I was soo not ready to confess my (almost year long) secret of having a blog.  I don't think he has ever even seen something I have created, other than home decor items. I'm not sure what I was so afraid of because he was excited for me, and he couldn't understand why I would hide it.

WOOHOO! THANK YOU KRAFTY GIRLS!

     Now I have a confidence I didn't know I could, just from professing my love (passion!) for paper crafting.  I'm sure you crafty people out there hear me huh?   Now how this ties into my Krafty Girls Challenge for the week.  Well... I was LATE making it.  SHHHH!!  I know.. I should have been prepared.  I didn't forget or anything like that, I just didn't know where to look.  I should have done more exploring. BUT but but.... I finished. It's not my best work, but I actually like it.  Without my new confidence I would have cried and given up, but NOT THIS TIME SON.

    The Challenge is to use a "face", which is something I really don't use, (in Tay-Swift voice) LIKE EVER! Though I received some awesome stamps from Unity Stamp Company in the mail yesterday.  I picked my favorite sentiment, and I let it be my inspiration.

Here is the Product :)
It really is a great sentiment isn't it? 


    I really think it turned out alright. I really hope you all enjoy it! Now to get an envelope made and put this baby in the mail.  

Here are the supplies I used:
  •  The patterned papers are from Michael's they're from Recollections Simply Pastel.
  •  The solid papers are just basic Recollections cardstock.
  •  The sentiment is a Unity Stamp Co Itty Bitty Stamp called "being kind strengthens others".
  •  I also used my Cricut, for the frame it was "Elegant Edges" and animals were from "Give a Hoot".
  •  I used a Sakura pen for faux stitching and to darken the eyes, nose, and mouth. 
  • The velvet ribbon is from the dollar section at Michael's.

  Thank you all for coming by to see me, and my no-longer-secret blog. Be sure to submit your "face" projects over at Krafty Girls!  Can't wait to see you all there! Thanks for Reading! 

~Dusty

Monday, June 2, 2014

"Souper" Cheap Cricut Cartridge Storage

Hello All :)

     It has been a few days since my last post, and man have I been busy.  I thought Summer was supposed to slow life down a little, but between drama camp, t-ball games, and out of town trips we have been busier than when school was still in session.  I think I need a beach and an umbrella drink in my hand, who's with me?

    Today's post is a super cheap way to store Cricut cartridges.  I know they have binders and bins and folders and cases, but I have always been the kind of person who prefers original packaging if at all possible.  For example, I used to "laminate" my crayon boxes with clear packing tape to prevent them from tearing up.  I know.. Major Nerd!  I can't help it. Anyway, I was looking for ways to store the Cricut cartridge boxes about a year and a half ago, and I found a box that they fit PERFECTLY into.  Now, here is where the cute little pun in the title comes into play.  The box that fits them perfectly is.... a Ramen Noodle box. Can you believe it?  Everyone in my family really actually likes Ramen Noodles.  They aren't just for poor college kids. lol.  Please don't judge us.

    If someone else has already come up with this, then I am sorry for reposting it without credit.  I really haven't seen anyone else do this, and it was pure luck when they fit so well.  This works with the Cup of Ramen boxes as well.  One of the boxes is longer than the other, though that just allows 1-2 more cartridges fit into it.  This works with the new cartridges that use the universal overlay as well.  They're half the length of the originals, so you can fit two.

    The boxes are so convenient.  You can see the spines clearly, so you can see what cartridges you
 have.  With mine I got really tired of looking at the cardboard, and at the time money was a little scrunched.  Enter: Dollar Tree shelf liners.  I wrapped the boxes in the contact paper shelf liners from  Dollar Tree.  I used the wood grain one.  I have 6 boxes full of cartridges, and I think I only used 2 rolls.  That's only $2 or with our tax rate.. $2.16.  Pretty cheap, plus it was a way to repurpose some boxes I was just going to trash anyway.
 
AND NOW FOR PICTURES
Before
(Sorry for quality, these are almost 2 years old.)
 
After 
 
And here are a couple today.


    They're still holding up well, and as I get more cartridges we eat more Ramen.  Hope this helps some of you guys out there. Can't wait to share some pretty cards very soon. Thanks for reading :)
 
~Dusty